A picture tour of the course
One screenshot for each part of the course, with arrows on the button being described. Ten minutes of looking and you will know where everything is.
Reading a lesson and running Python need no account. Saved progress and the AI tutor need one. The course is continuous: no start date, no end date, and nothing is due.
1. Everything starts on the course page
Sections on the left, the next thing to do at the top, the module list underneath. You will come back here often.
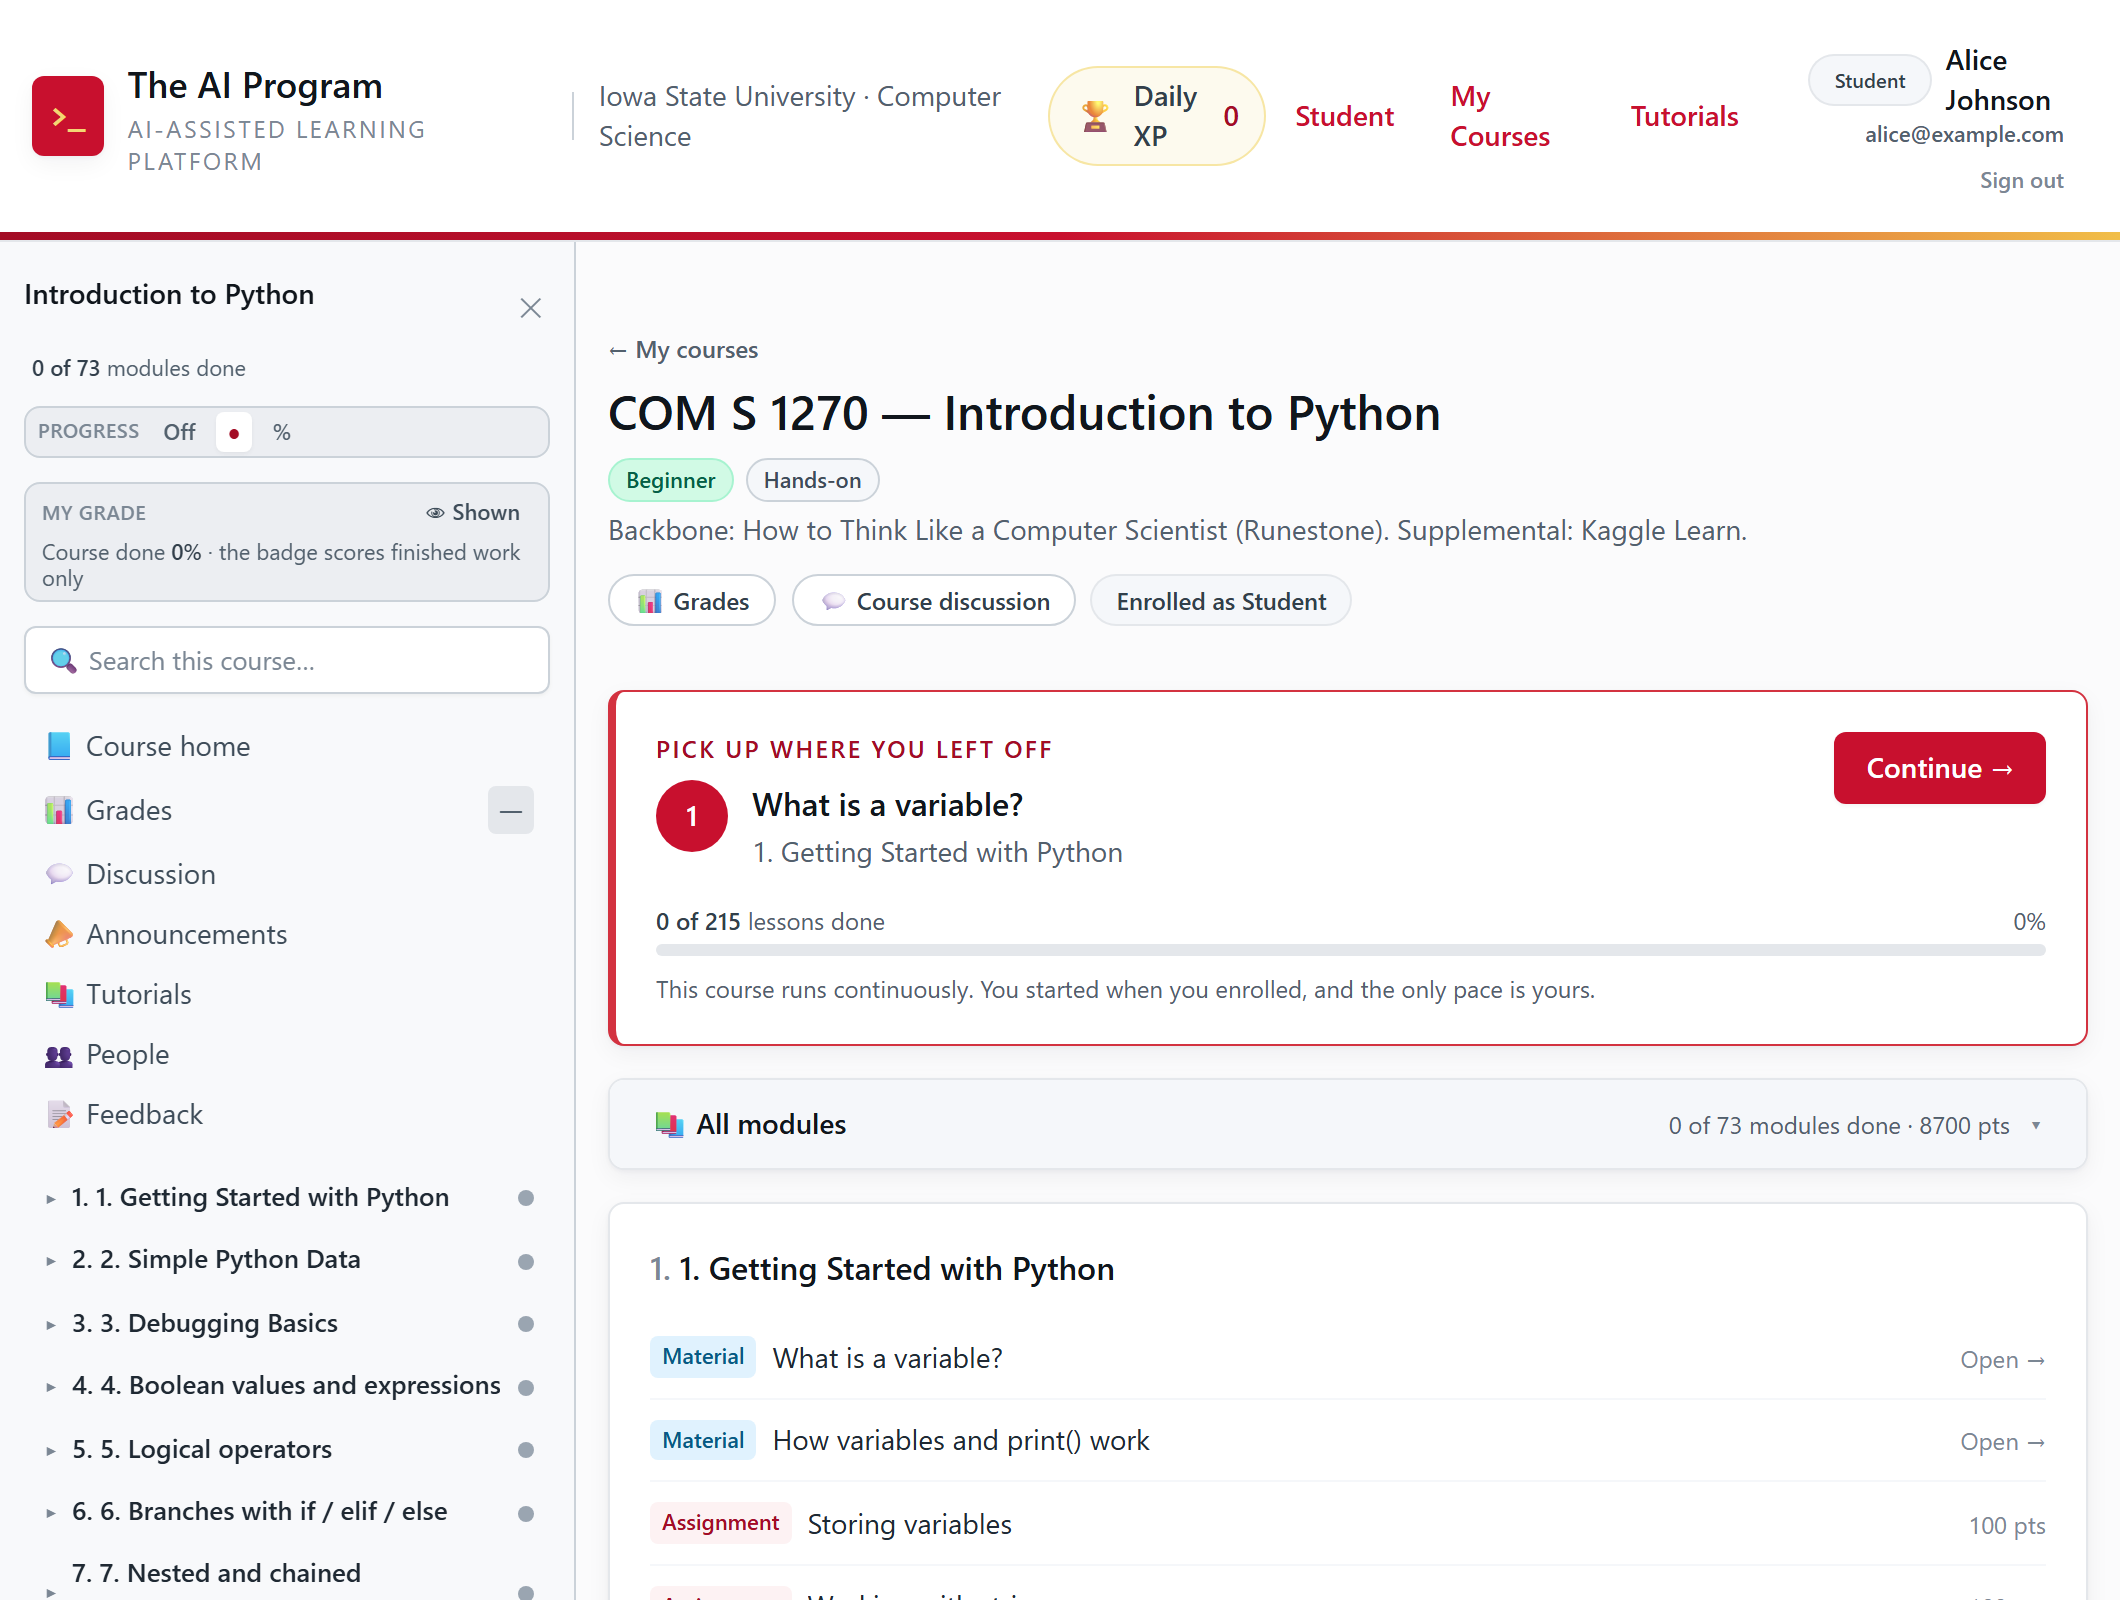
- 73 modules, all here: The sidebar holds every section. Click one and it opens its lessons.
- What to open next: The card at the top always points at your next unfinished step.
- Every step in the module: Below the card, each module lists its steps in the order they were written.
2. The card at the top
Click Continue and you land on the step you have not done yet. Nothing on this card is a deadline, because the course does not have any.
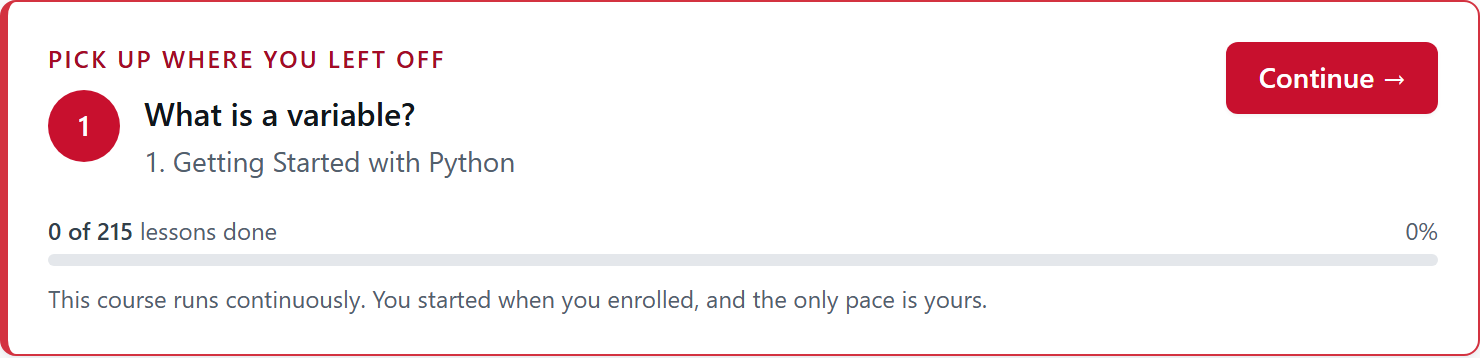
- Picks up where you stopped: One click and you are back in the runner, on the right step.
- How far you have got: Lessons finished, out of the whole course.
- No deadlines: The course runs continuously. You set the pace and nothing expires.
3. What is inside a module
Most modules are three short steps: a video, a reading, then an exercise you code. The opening ones, like this, run longer.
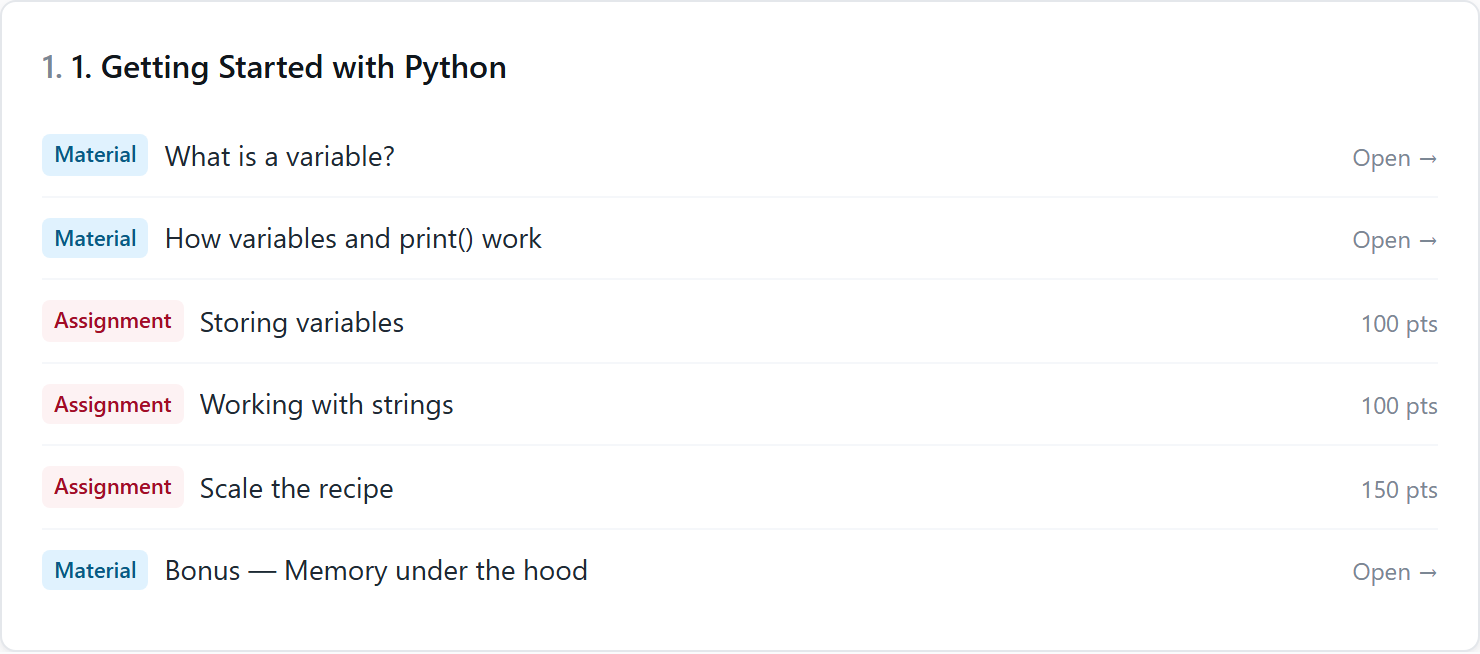
- Watch or read: Material is a video or a reading. It earns XP but carries no grade.
- You write code: Assignment is an exercise you solve in the editor.
- What it is worth: The points an exercise adds to your grade once it passes.
4. Watching a lesson
Every module opens with a recorded lecture of a minute or two. The notes underneath say the same thing in text, for when you would rather read it.
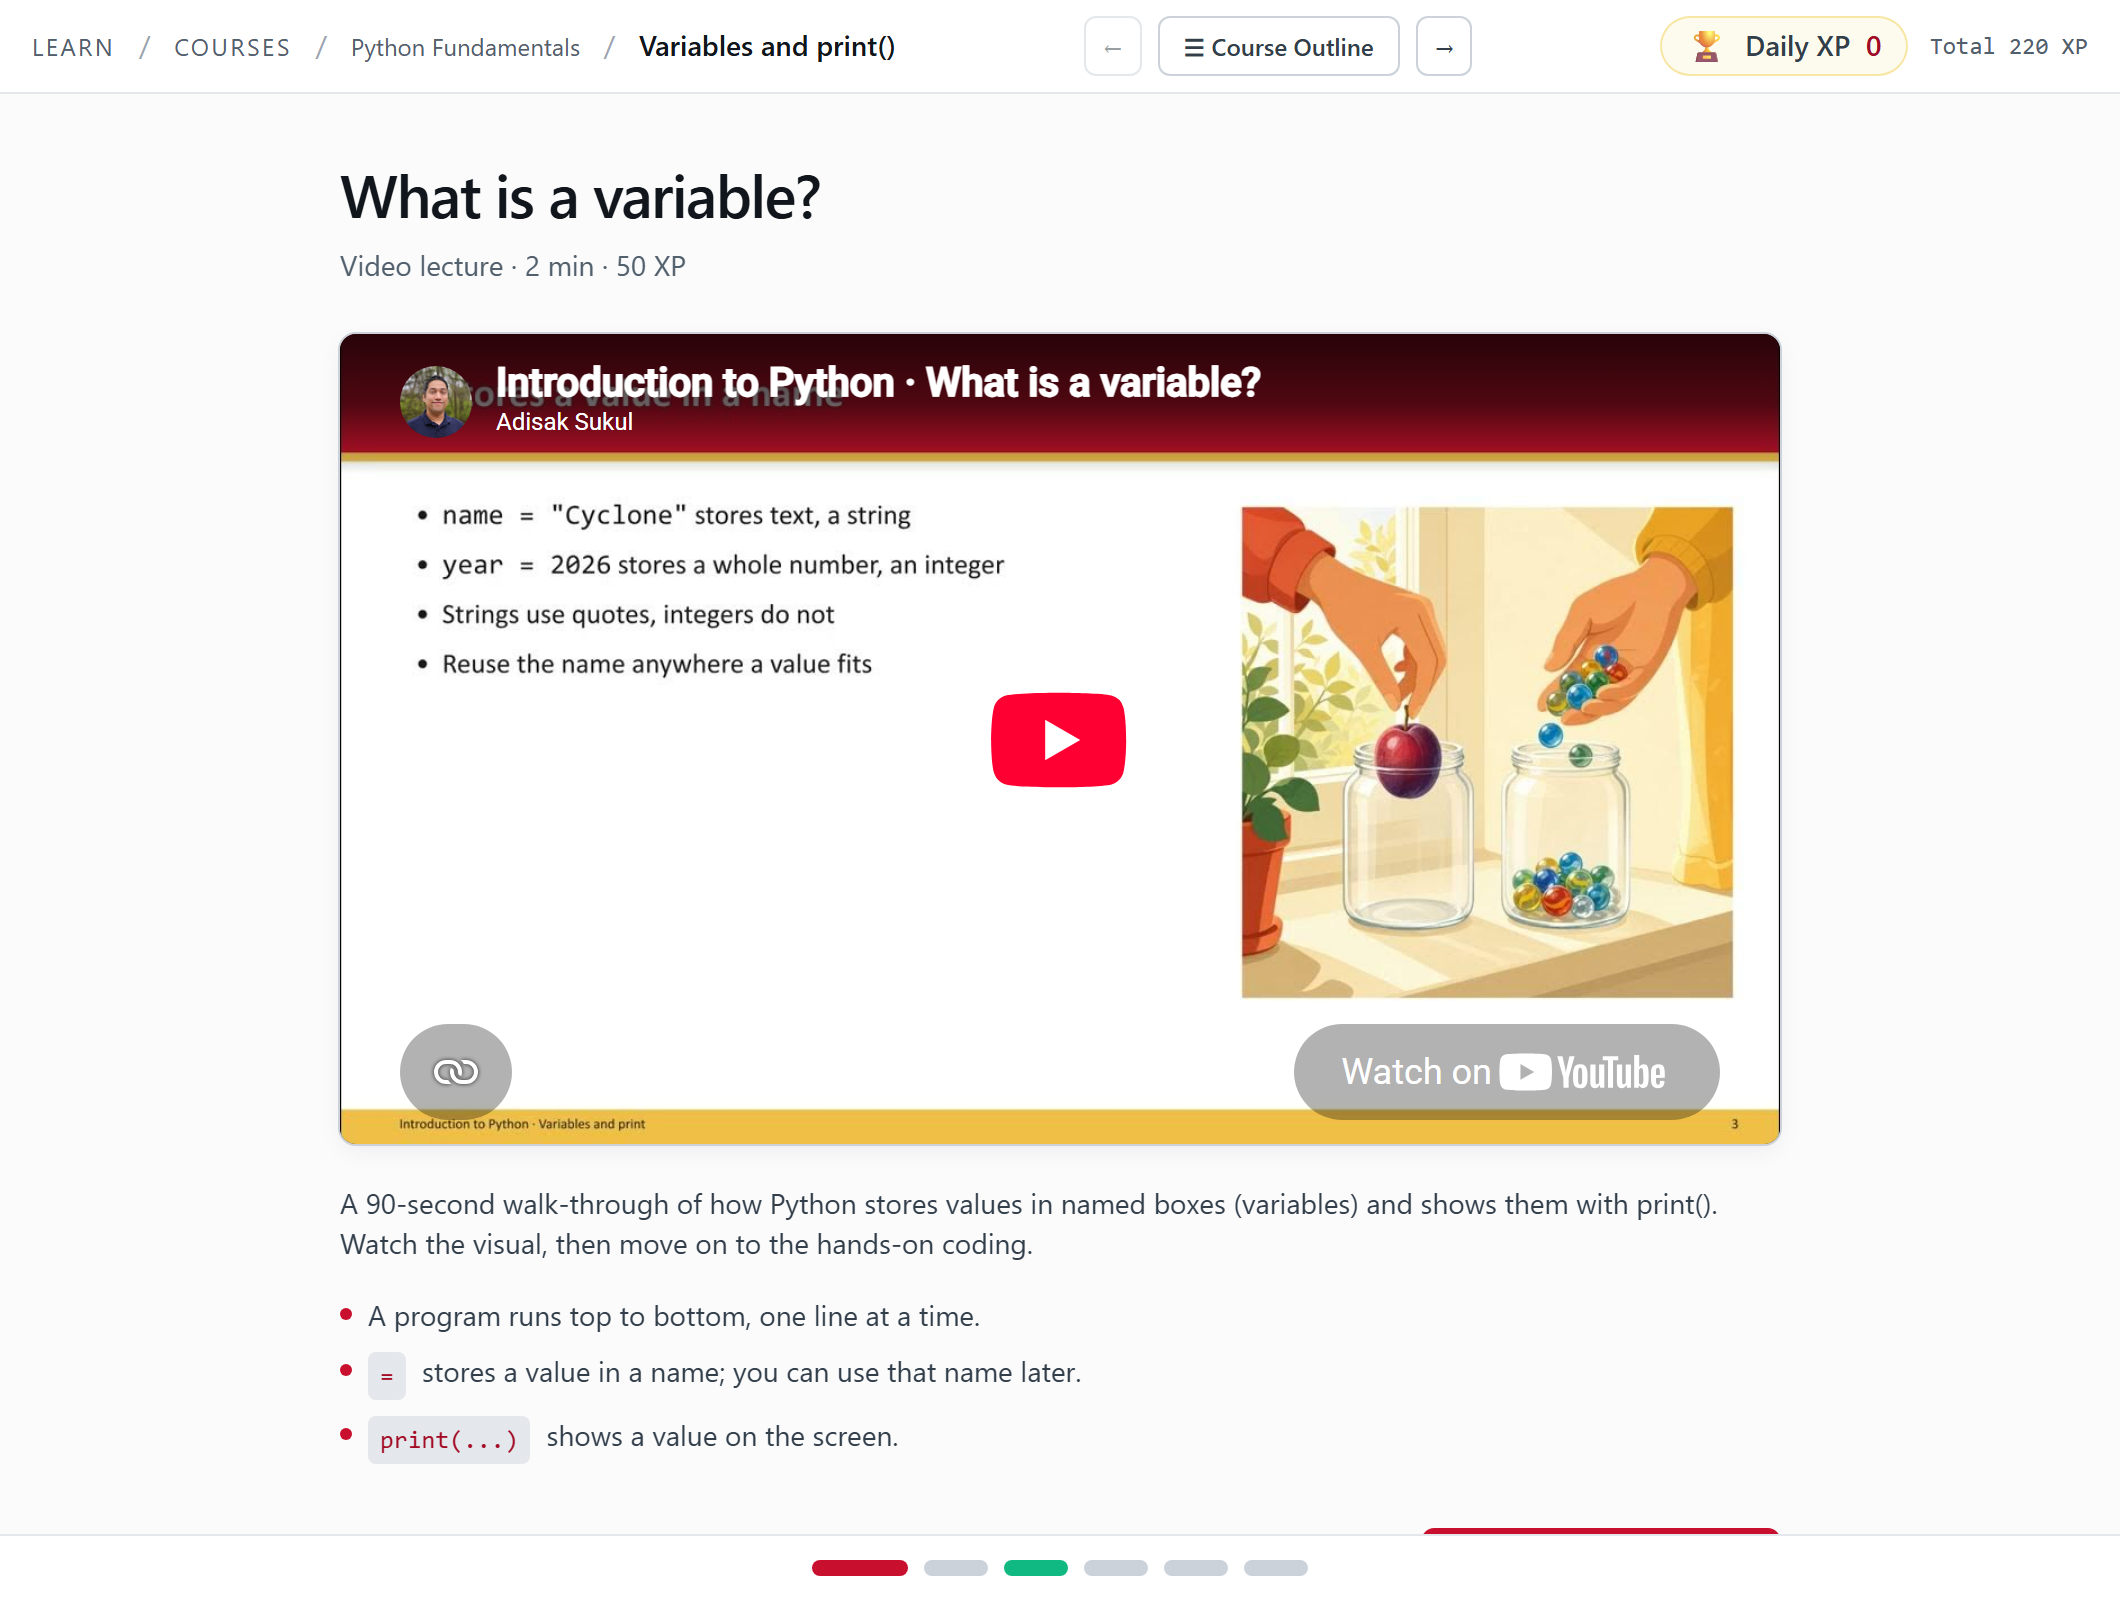
- What it is worth: Every step says what kind it is and how much XP finishing it gives you.
- The same points in text: Notes under the video, so you do not have to scrub back through it.
Scroll to the bottom for the button that ends the step.

5. Reading a lesson
A reading is plain explanation with worked examples. Same shape as the video step: a title, what it is worth, and a button at the bottom.
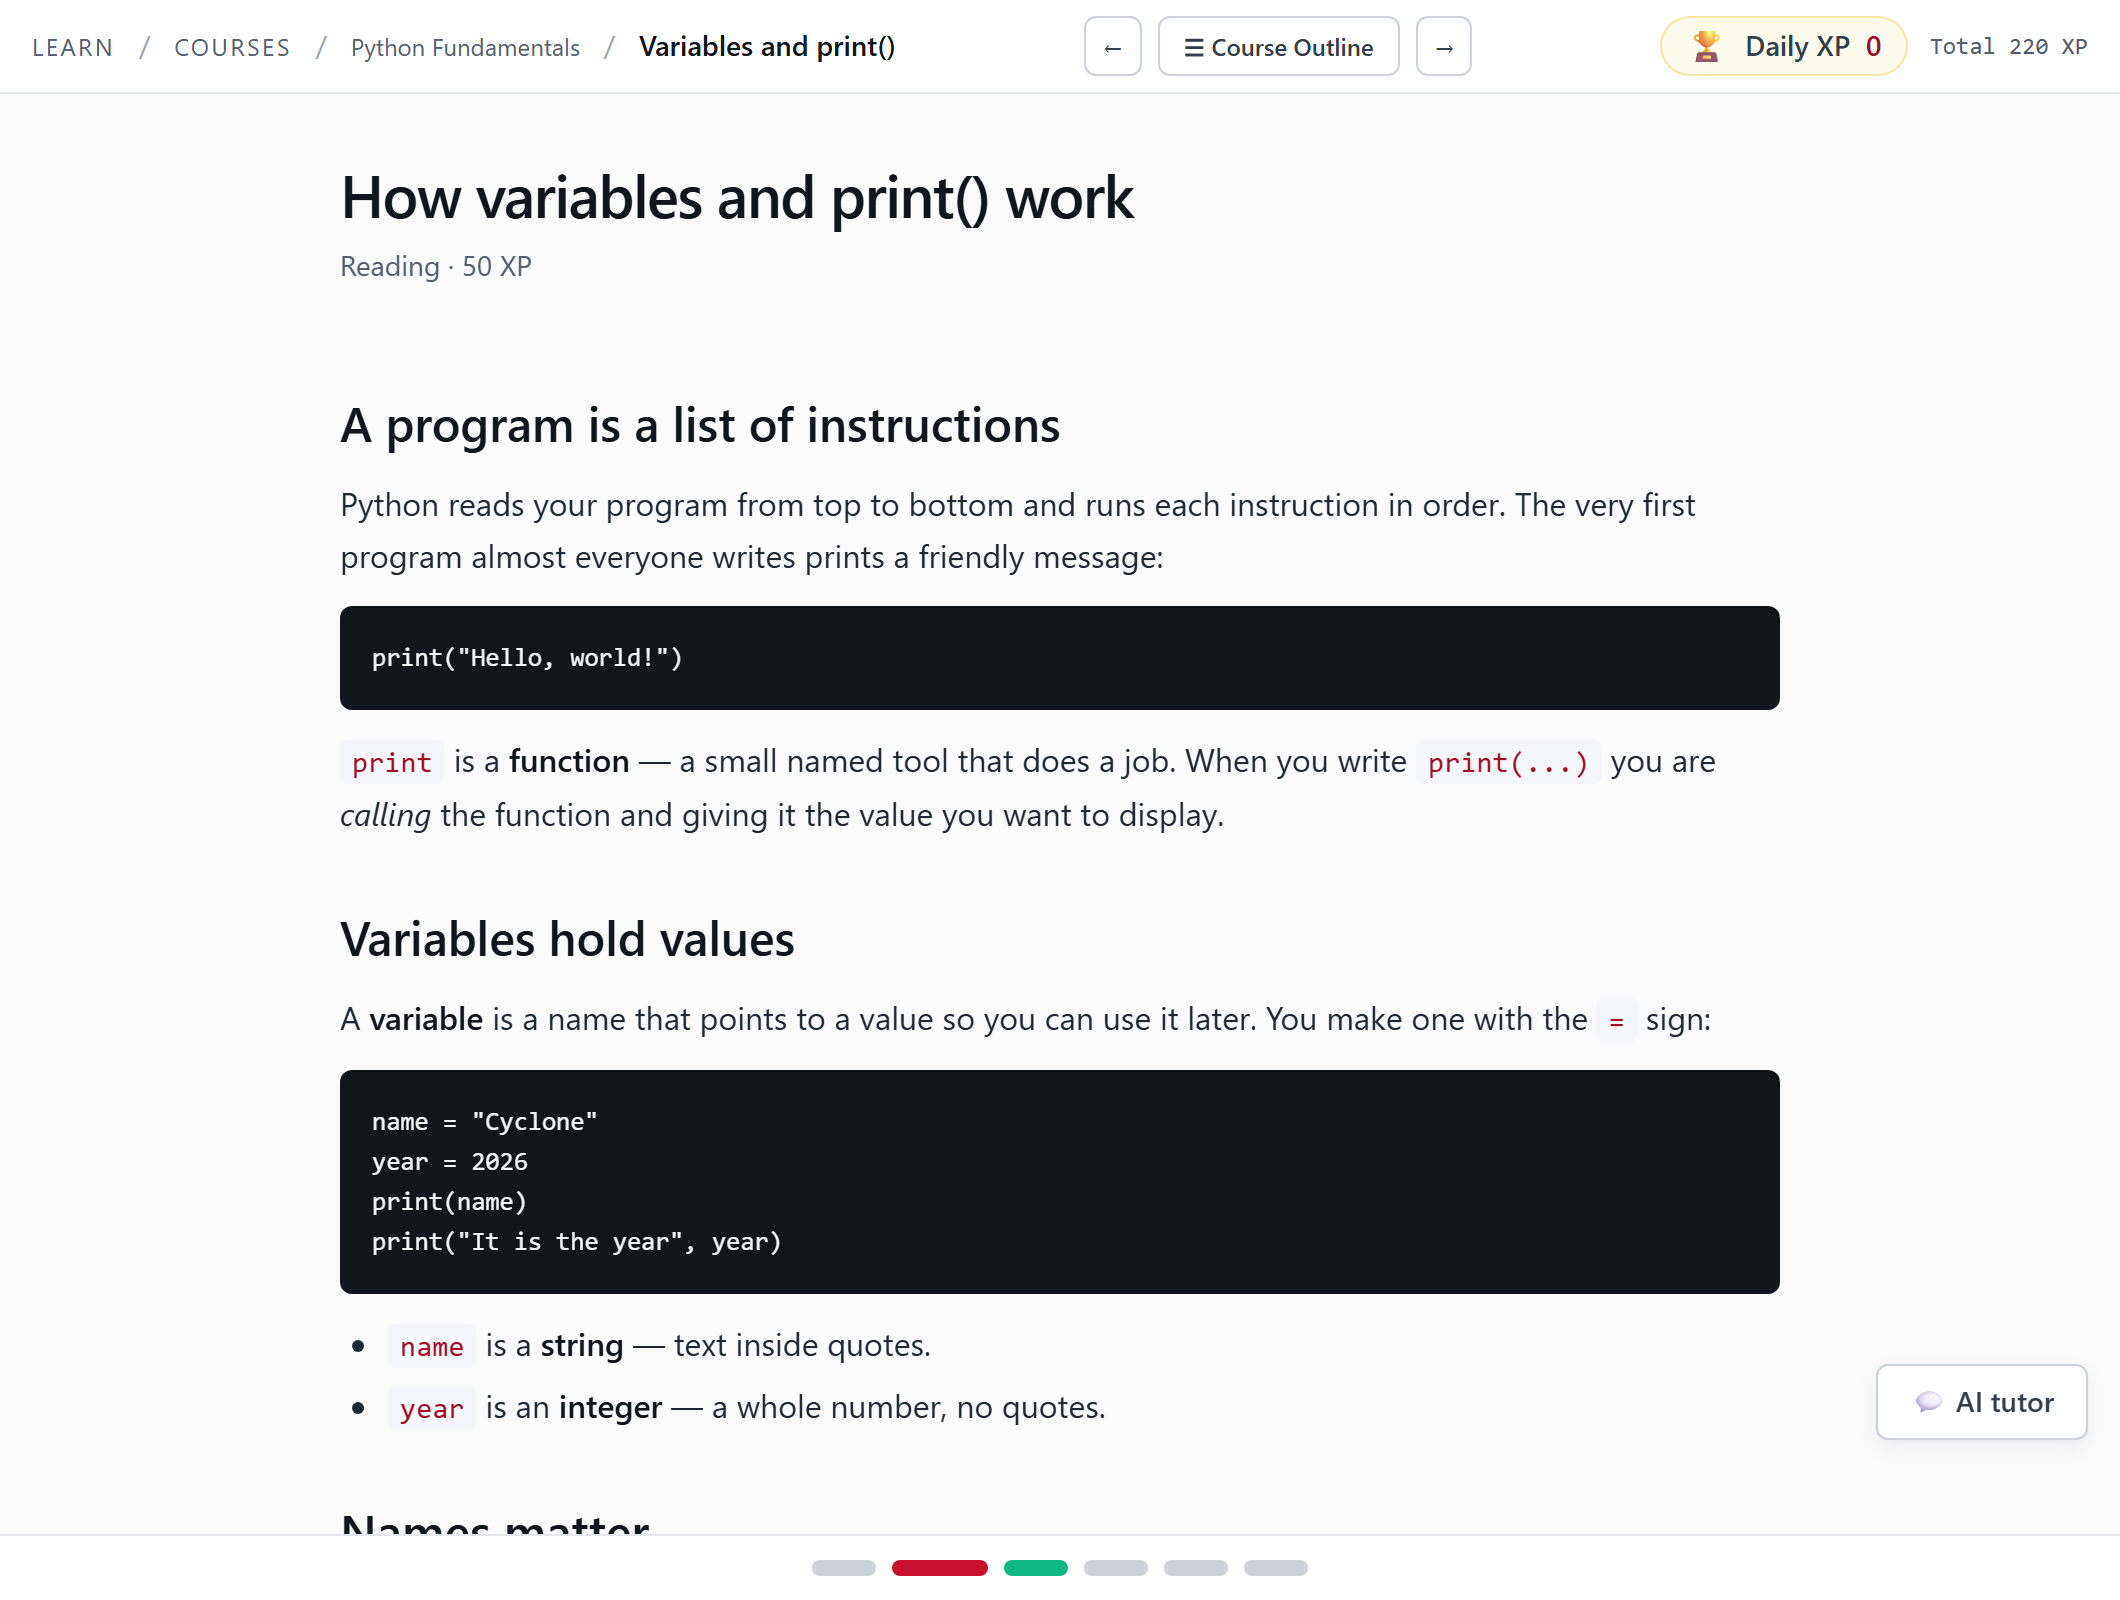
- Reading, and its XP: Readings are worth XP too, and you finish them the same way.
- The tutor is always here: This floating button opens the AI tutor, on every step of the course.
Some readings carry a tracer under the example. Press Trace and walk through the program a line at a time, watching the variables appear.
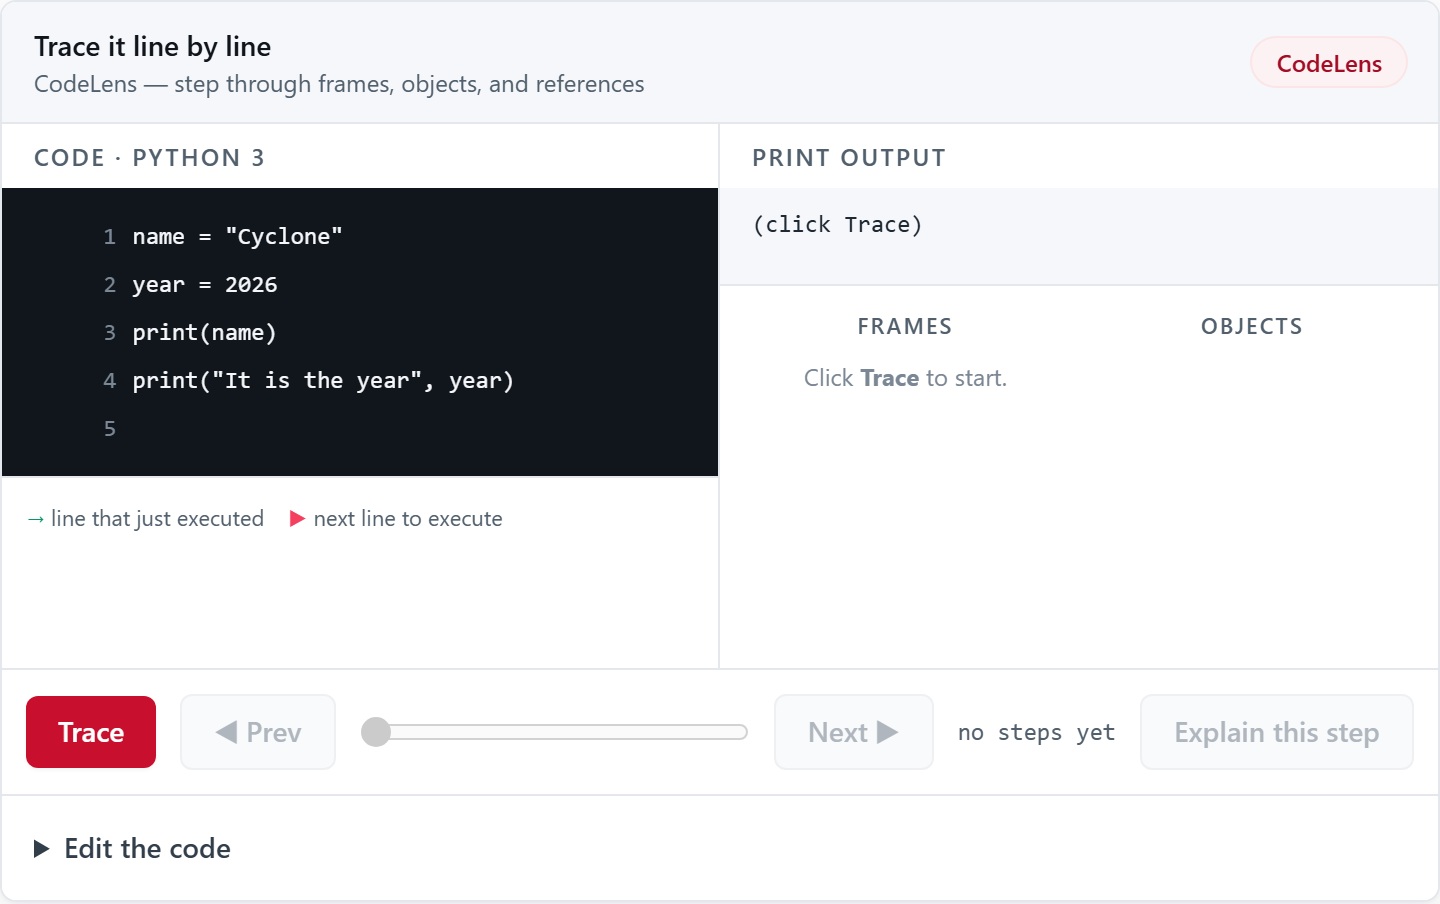
- Press Trace: Then Next walks forward one line and Prev walks back.
- Variables show up here: Frames and objects, updated at every line. The fastest way to see what a program is really doing.
6. Readings with a live editor
Each lesson also exists as a full reading page, and there the examples are editors you can type in. The course page does not link to it, so here is the first one: lesson 1 as a reading page.
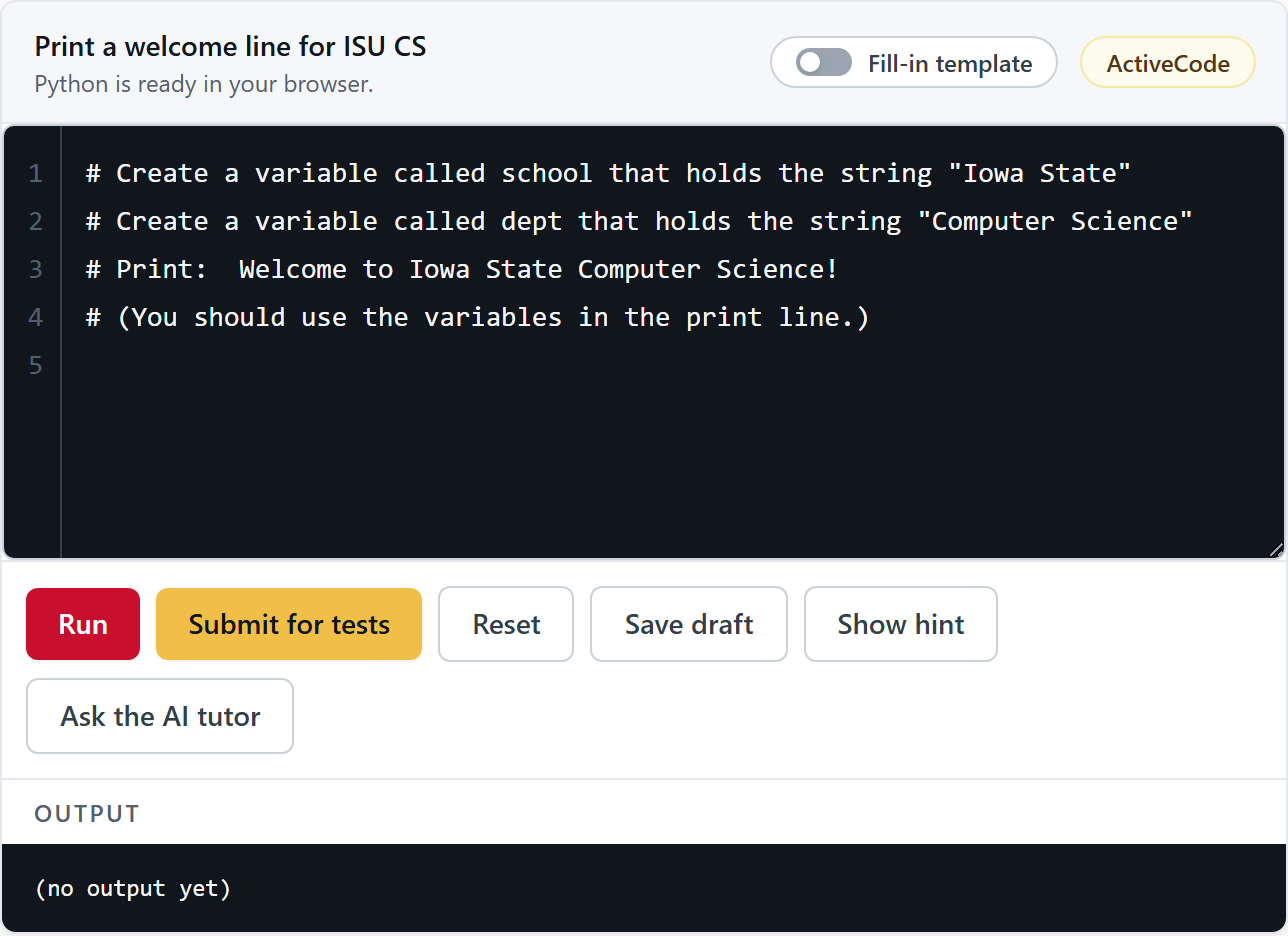
- Runs your version: Change the example, run it, break it on purpose. Nothing here is graded and there is no limit.
- Needs an account: The tutor is the one control here that asks you to sign in. Run and Reset do not.
7. Doing an exercise
An exercise splits in two: what to do on the left, where to do it on the right. The starter code has blanks in it for you to fill.
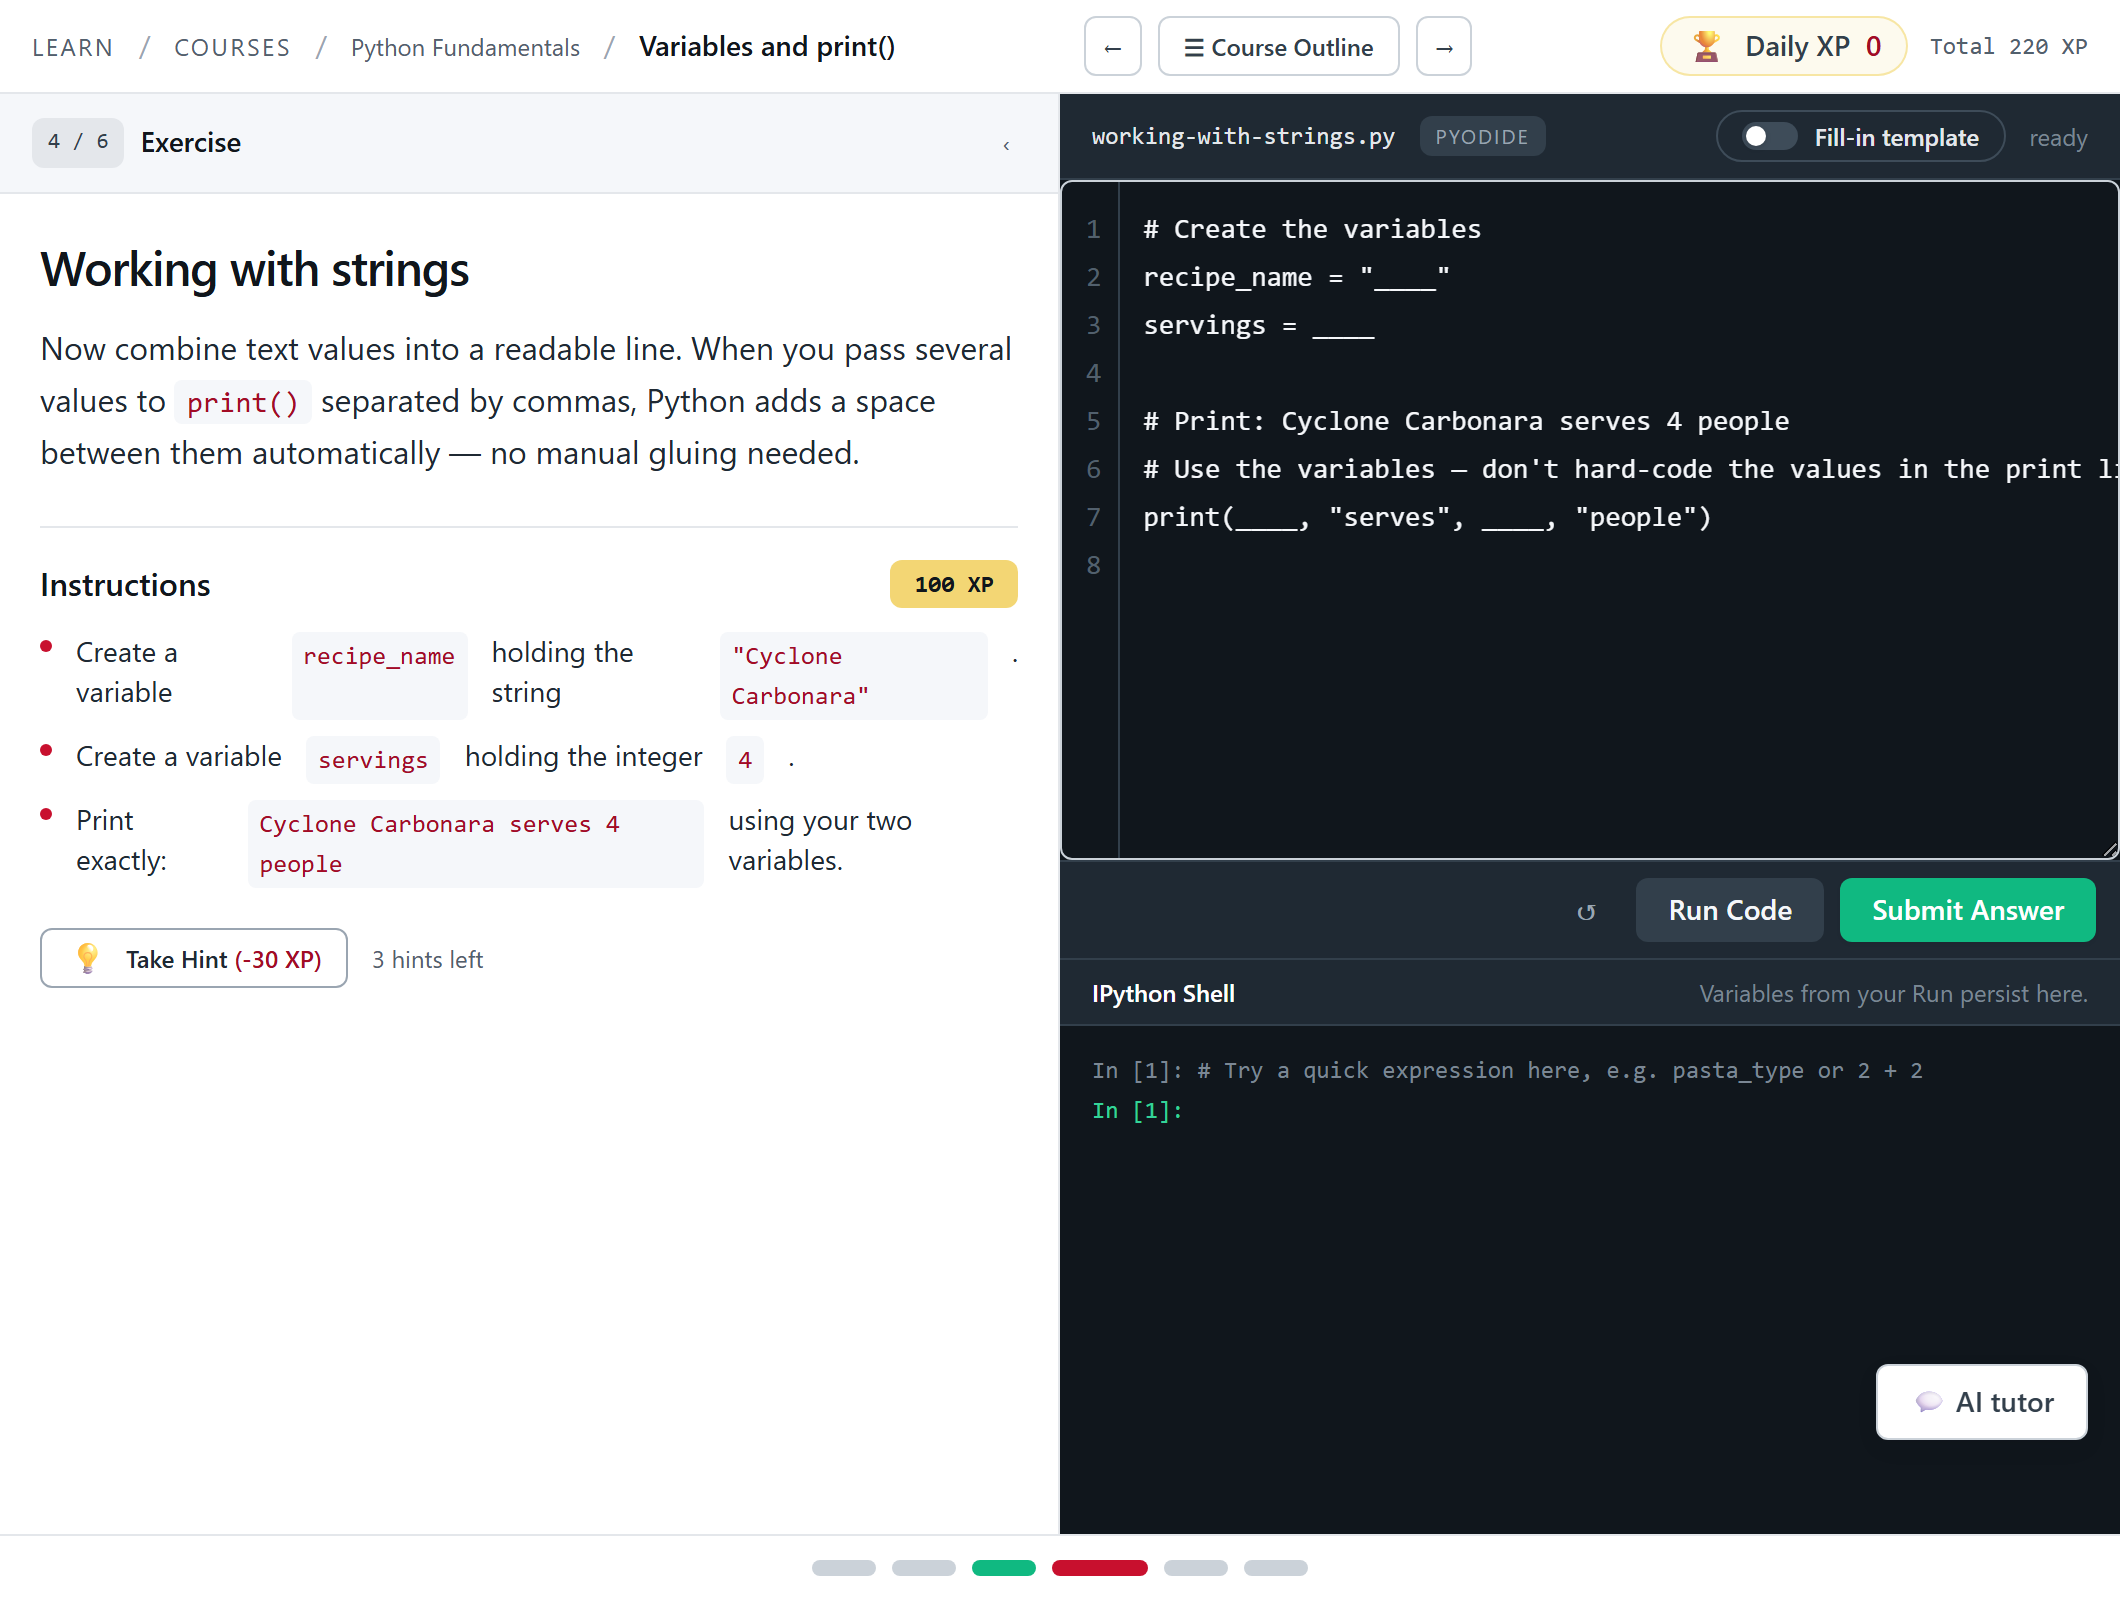
- The task and its XP: Read all of it. The instructions name the exact variables the tests look for.
- Your editor: Python itself runs inside your browser, so typing and running here cost nothing.
- Output lands here: Everything your program prints, and every error it hits.
Three buttons sit under the editor, and the difference between two of them matters.

- Start over: Puts the starter code back, for when an experiment goes badly.
- Try it, nothing counts: Run Code just runs your program. Press it as often as you like.
- This one counts: Submit Answer checks your work against tests you cannot see, and records the result.
8. Run first, then Submit
Run is how you find out what your code does. The error it prints is real Python, and learning to read it is most of the course.
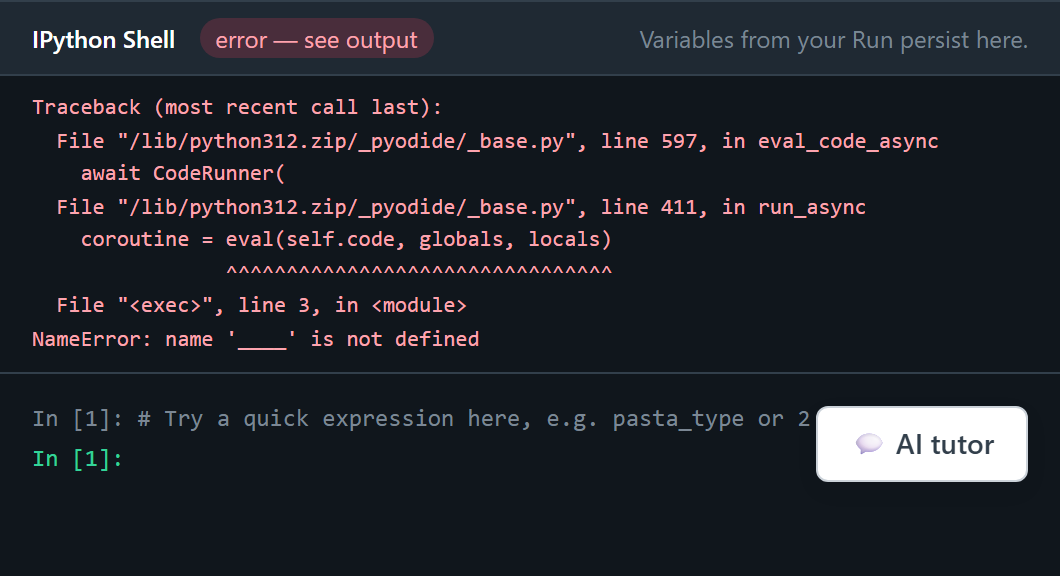
- Red means it stopped: Your program did not finish. This is normal and it costs you nothing.
- The real error: The last line names what went wrong. Here the blanks were never filled in.
Submit runs the hidden tests instead. They look at the values inside your program, so printing the right thing by luck does not pass.
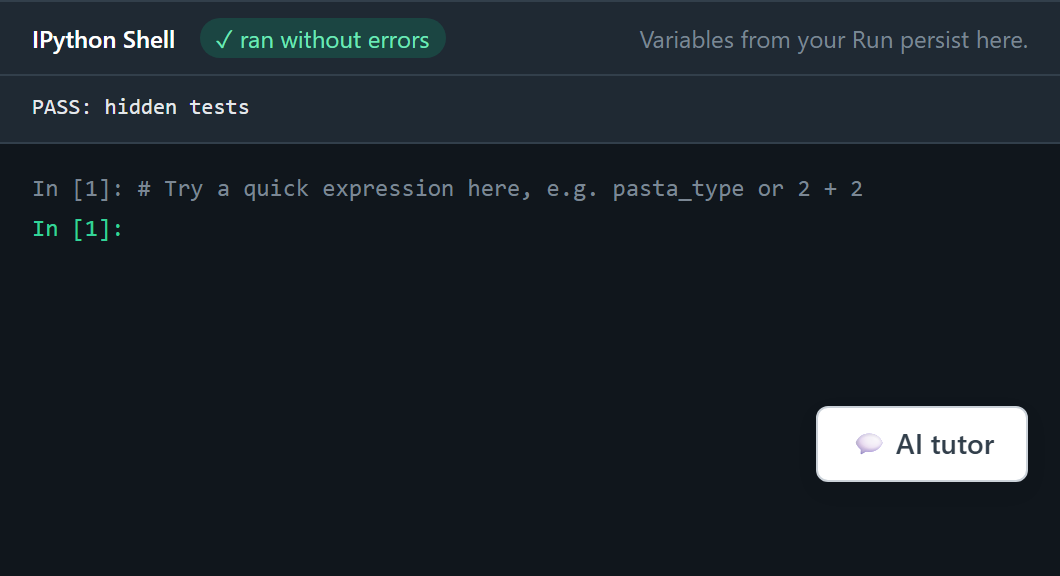
- Green means it passed: The chip in the shell header is the quickest read on the screen.
- The hidden tests: The report prints here. If a test fails it says which one, and you try again.
9. Hints, and what they cost
Every exercise carries three or four written hints. Each one costs 30 XP, the price is printed on the button before you press it, and the badge drops the moment you take one.
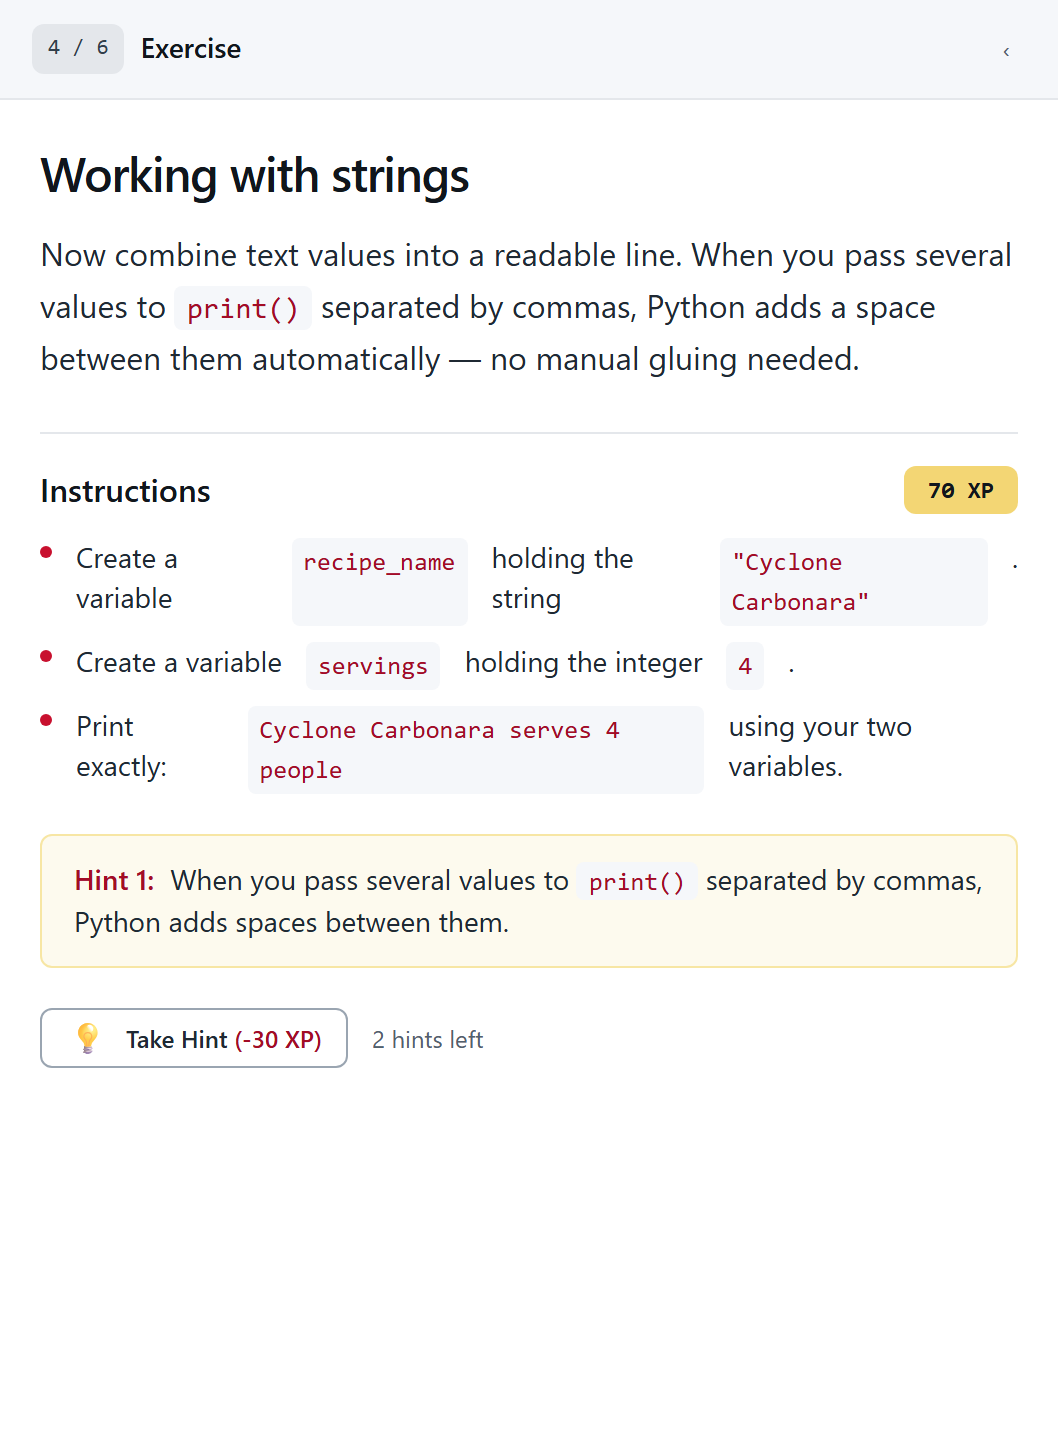
- Now worth 70: It read 100 XP before the hint. The number on the badge is what you can still earn.
- Each hint costs 30 XP: Taking all of them is allowed. It just leaves less on the table.
10. What a pass looks like
The shell turns green, the badge changes to what you earned, and the counters in the top bar move.
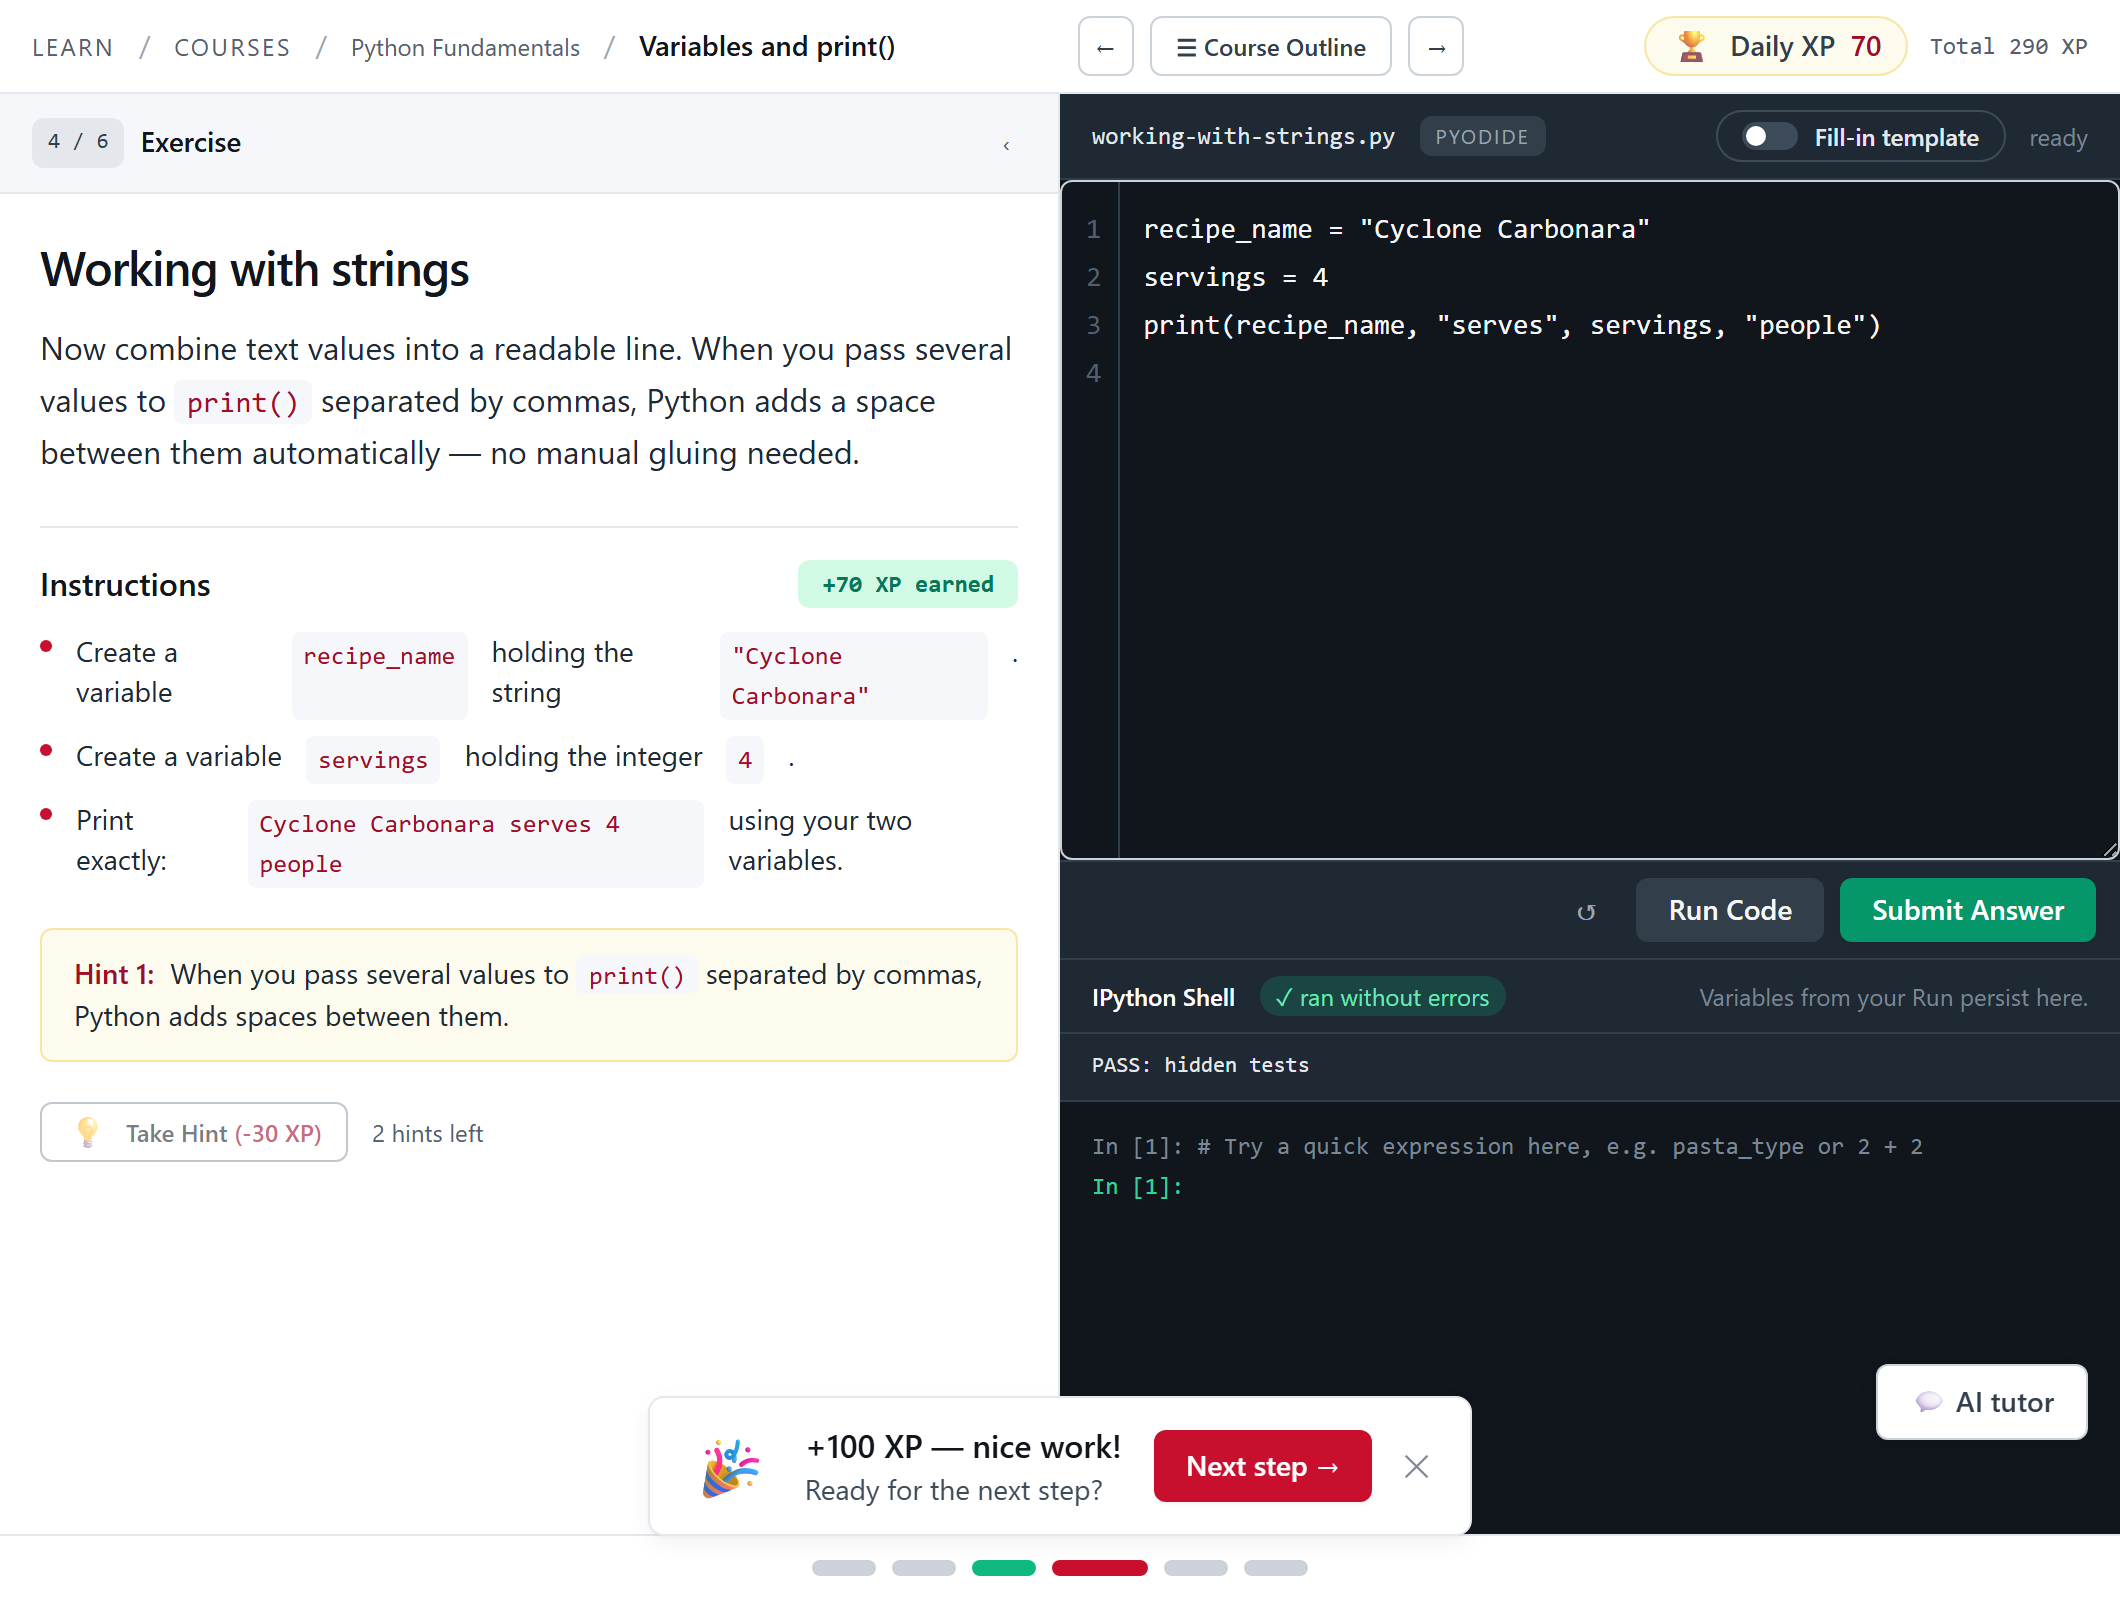
- What you earned: 100 for the exercise, less the 30 for the hint that was taken.
- Your XP moves: The daily and total counters go up by the same amount.
- Hidden tests report: Proof that the tests passed you, not that the output happened to look right.
11. The AI tutor
Opened from that floating button, on any step. It needs an account, and it coaches rather than answers: expect a question back, and help one rung at a time. Type what is actually confusing you, not a request for the solution.
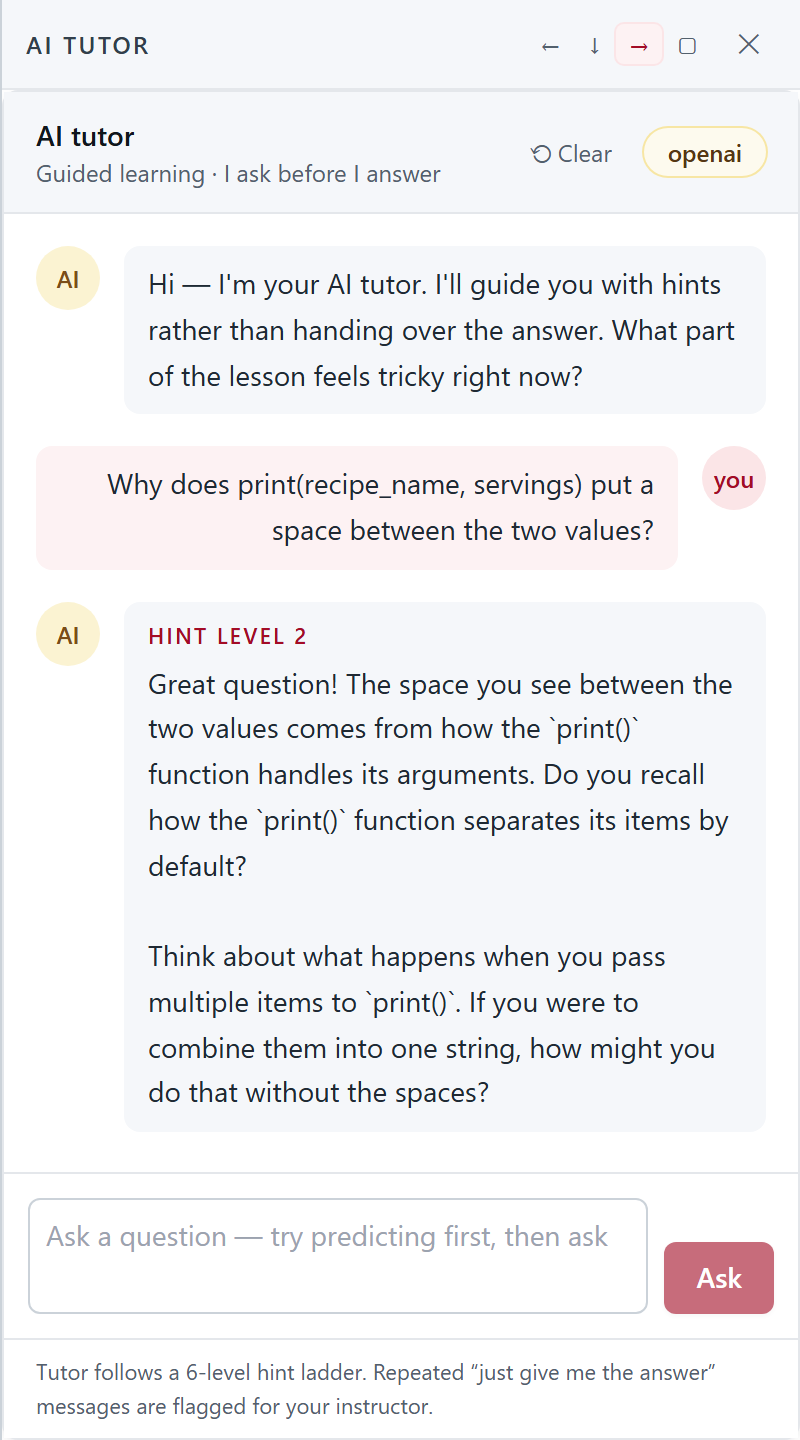
- It asks before it answers: That line is the whole design of the tutor, and it holds most of the time.
- One rung at a time: Replies climb a ladder of six levels. Asking again moves you up a rung, it does not skip to the end.
Worth knowing before you type. Every message you send the tutor is stored on your account, and course staff can read the conversation word for word. Clearing the panel hides a thread from you, it does not delete it. The privacy notice says where the rest of it goes.
12. Nothing is locked
The same bar sits across the top of every step. The arrows move one step at a time, and Course Outline opens the whole course.

- Back a step: The arrow on the other side goes forward. Neither one grades anything.
- Jump anywhere: Opens the full course outline over whatever you are looking at.
- XP so far: Today and in total, visible from every step.
At the bottom, one dot per step in the module. Click one to go there.

- You are here: The wide red one is the step on screen.
- Finished: Green is done. Grey is not done yet, and you can still click it.
The outline is the whole course in one list. Nothing is locked behind anything else, so you can skip ahead and come back.
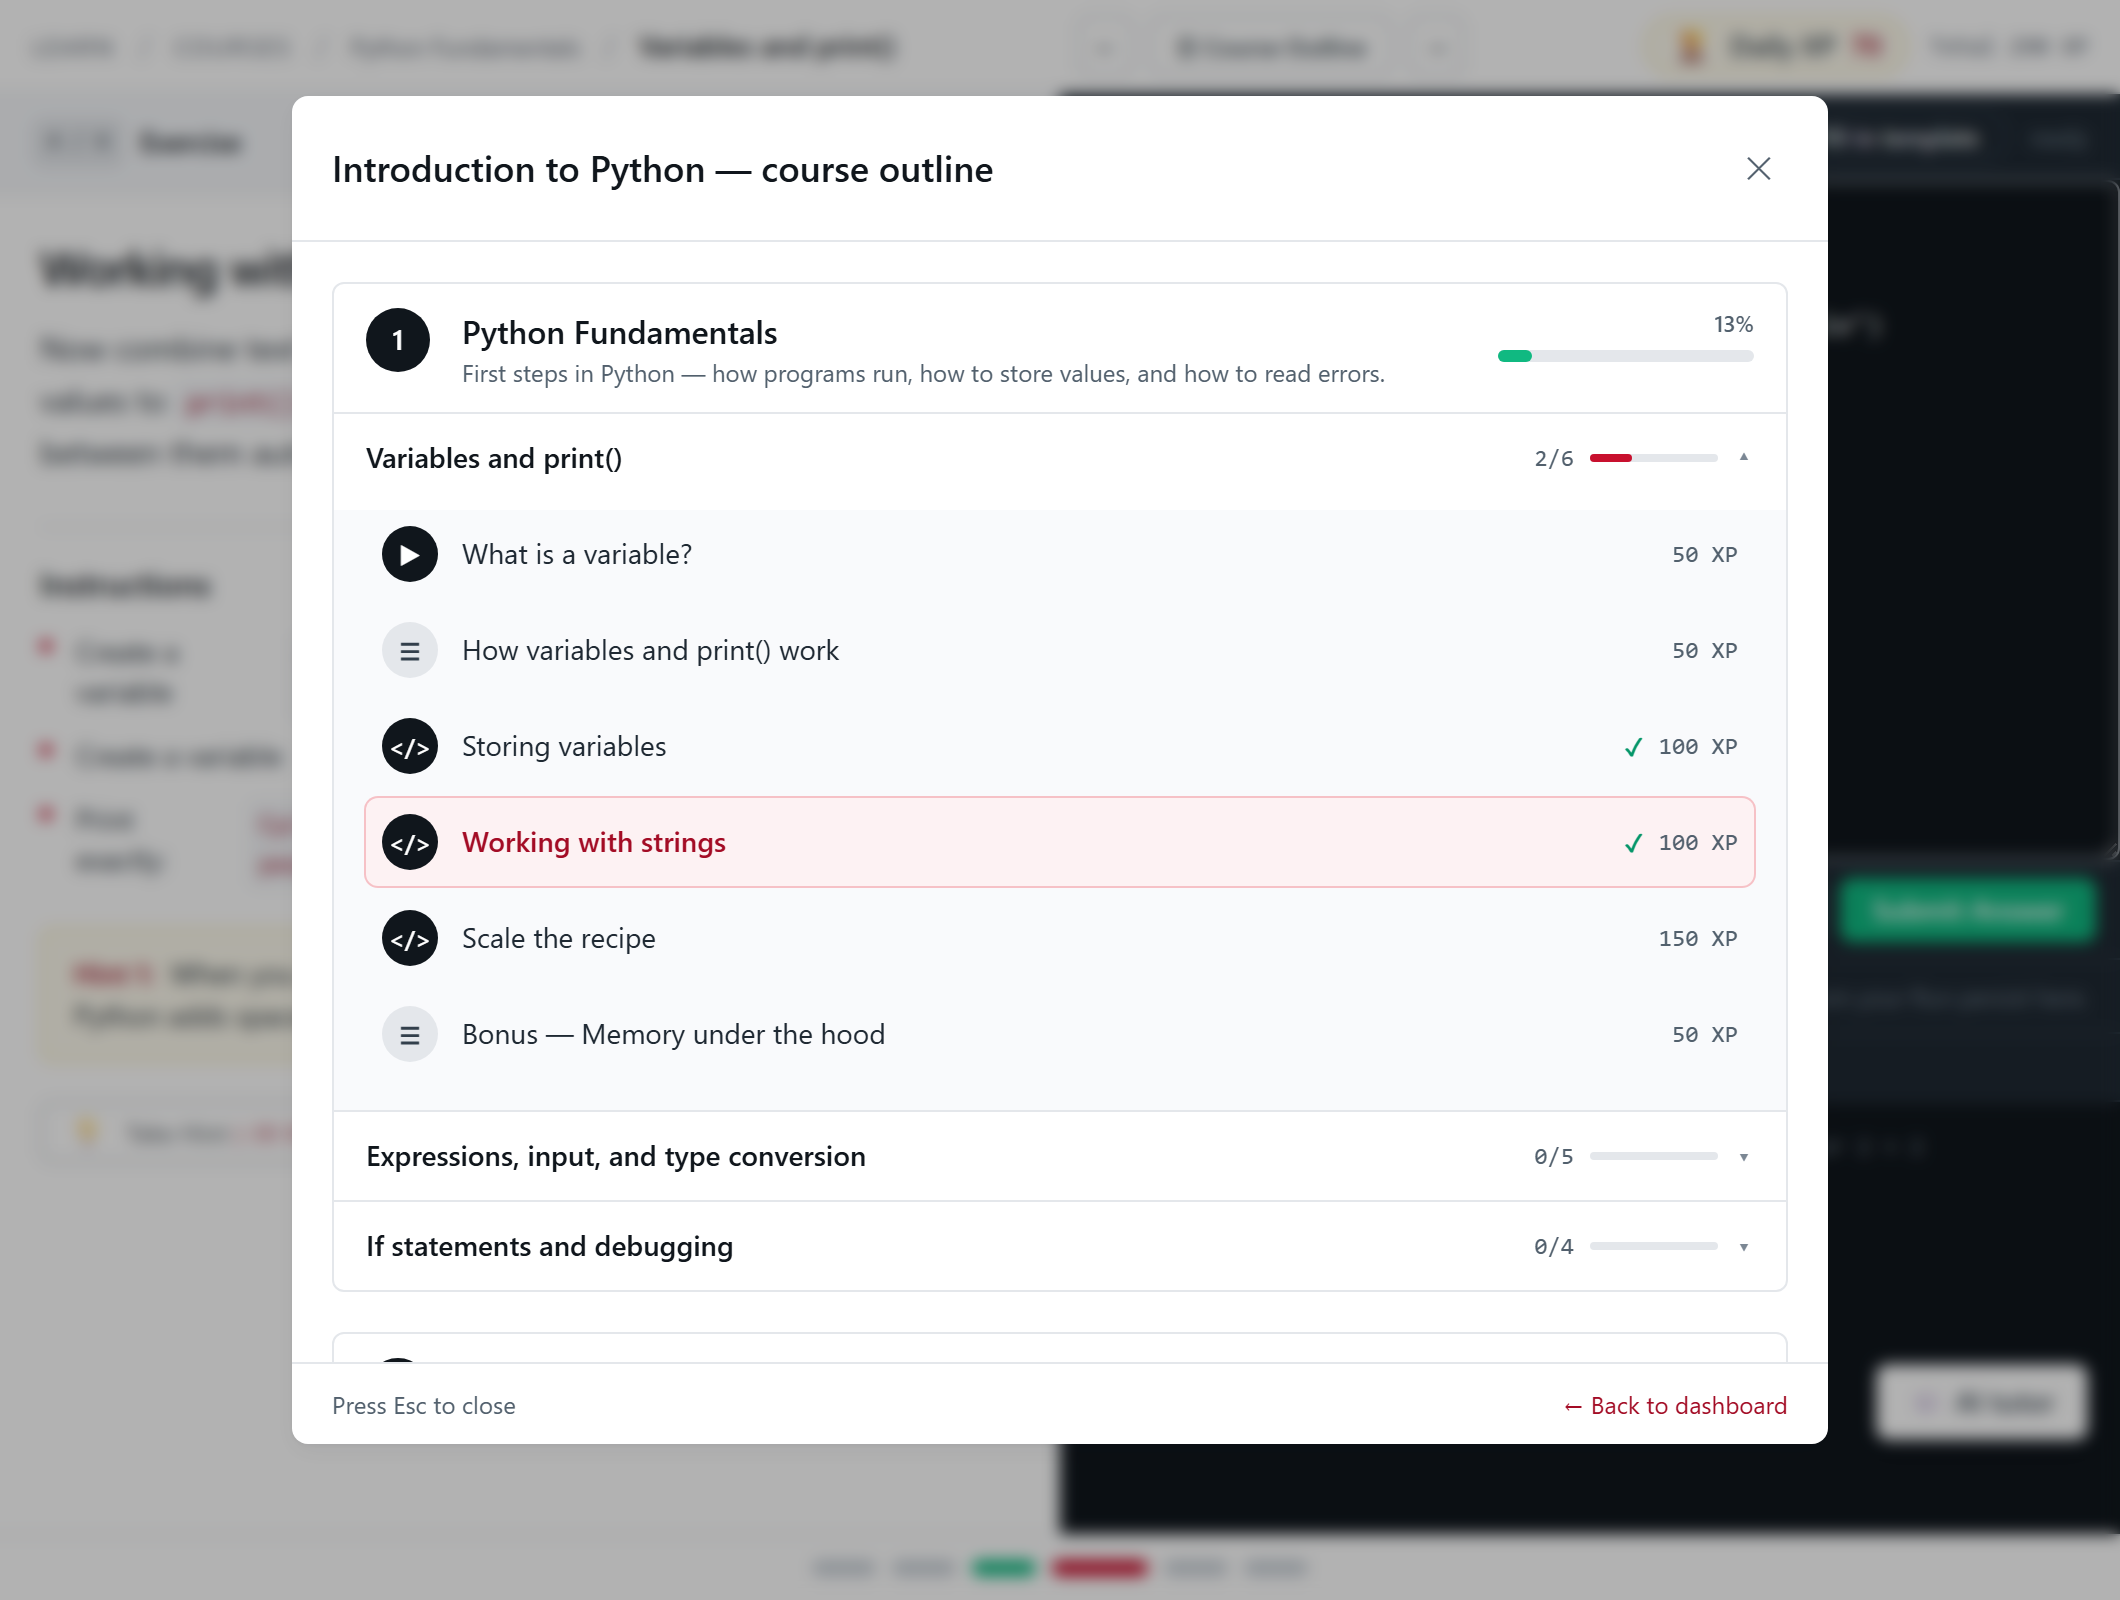
- The icon: It tells you whether a step is a video, a reading or code, before you open it.
- Done: A tick marks the steps you have finished.
- Click any row: Any step in any section, in any order. Nothing here is locked.
13. Seeing where you are
Grades, in the sidebar, is the honest picture: every graded exercise, what it scored, and how much of the course you have covered.
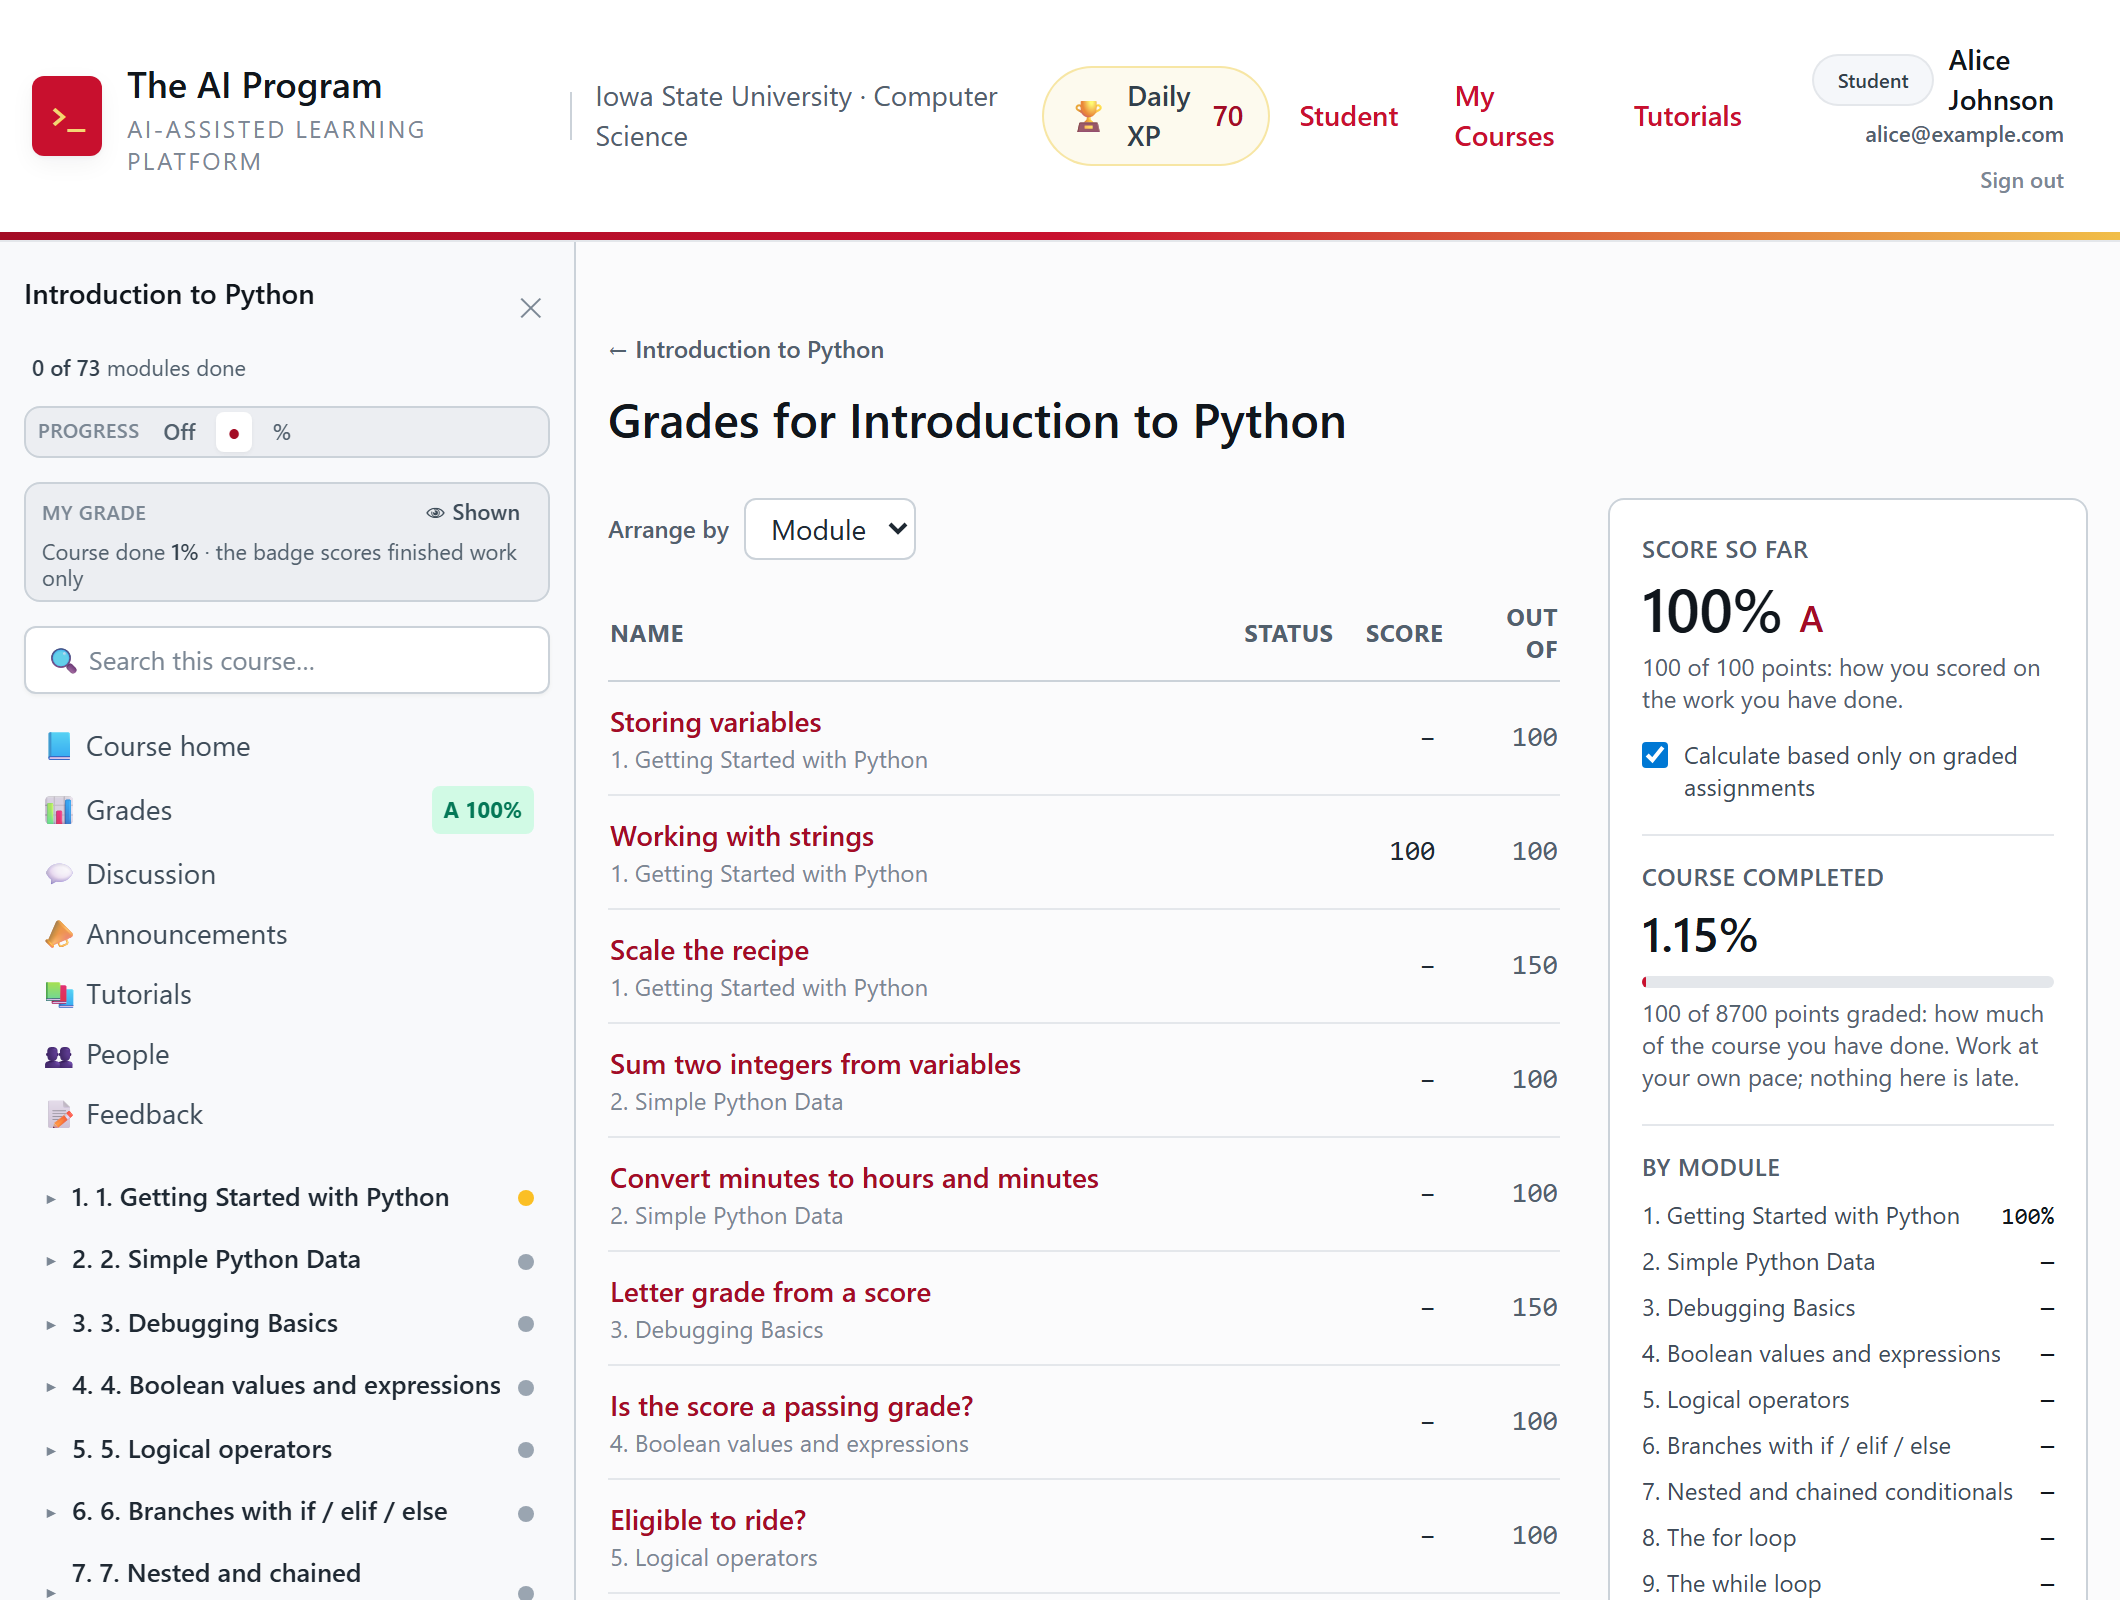
- Your score: How you did on the work you have actually done, not on the whole course.
- Nothing is late: The second number is how much of the course you have covered. There is no schedule to be behind.
That is the whole interface
Go and use it. If you would rather have the same ground covered in words, with every click spelled out, the eight written guides do that. If you have not signed up yet and want to know what you are joining, read Getting started.
Open the first lessonThe eight written guides →Getting started →